I still remember the day I demolished an entire pan of regular Rice Krispies Treats and then tried to convince myself it counted as dinner because, hey, cereal has vitamins, right? My stomach laughed at me for three hours, my energy levels face-planted, and my fitness tracker sent me a pity notification for missing my protein goal by a mile. That sugar crash was the culinary equivalent of a cliffhanger episode: infuriating and impossible to ignore. So I did what any self-respecting snack addict would do—I stormed back into the kitchen, spatula raised like a sword, determined to create a version that tasted like childhood nostalgia but acted like a responsible adult. The mission sounded borderline impossible: keep the shatter-crisp edges, the gooey stretch, the buttery perfume, but somehow sneak in enough protein to make my macros applaud.
Picture this: midnight, countertop dusted with cereal snow, marshmallow webs clinging to my sleeves, and the smell of melted butter curling through the air like it’s auditioning for a bakery perfume. I’m whisking vanilla protein powder into warm milk like a mad scientist, praying it won’t turn into chalky lumps. Spoiler alert—the first batch tasted like a body-builder’s shoe. The second batch glued my jaws together. But the third? The third sent me sliding down the hallway in socked feet, waving a sticky square like an Olympic torch, because I’d cracked the code. These bars had the crackle, the stretch, the soul-soothing sweetness, plus twenty-five grams of protein per serving. My taste buds did cartwheels while my diet tracker gave me a virtual high-five.
Most “healthy” marshmallow treats taste like regret and cardboard had a sad little baby. They’re dry, rubbery, or weirdly chemical, and they sit in your stomach like a protein-rock. This version is the polar opposite: soft where it should be soft, crisp where it should be crisp, with a buttery vanilla perfume that drifts through the house and lures roommates out of their bedrooms like cartoon characters floating on scent trails. I dare you to taste one and not go back for seconds; I double-dare you to stop at one row. Future-you is already pulling these from the fridge at 6 a.m. before spin class, or crumbling them over Greek yogurt for dessert, or bribing coworkers with shiny squares in exchange for Monday-morning mercy.
Stay with me here—this is worth it. I’m about to show you why most recipes get this completely wrong, how a simple temperature tweak keeps the texture cloud-soft, and why the protein powder you choose can make or break the snap. By the end, you’ll wonder how you ever settled for the plain-jane back-of-box recipe. Let me walk you through every single step—by the end, you’ll wonder how you ever made it any other way.
What Makes This Version Stand Out
Protein-First: Every gooey square delivers a legitimate 25 g of complete protein, turning a childhood sugar bomb into legitimate post-workout fuel. No gritty texture, no weird aftertaste—just pure marshmallow comfort that quietly helps muscles rebuild while you lick your fingers.
Texture Alchemy: We melt butter only halfway so the milk solids stay toasty and nutty, then fold in cereal at the exact moment the marshmallows resemble lava. The result is shards that shatter like thin ice, followed by a chewy center that stretches like taffy but sets like velvet.
One-Pot Wonder: Zero fancy gear—no double boilers, no candy thermometers, no silicone molds shaped like woodland creatures. If you’ve got a saucepan, a wooden spoon, and a baking dish, you’re five minutes away from snack nirvana.
Macro-Friendly Indulgence: Each serving clocks in under 350 calories with only 15 g of fat, meaning you can smash two squares and still have room for a loaded dinner. Compare that to bakery protein bars that cost three bucks apiece and taste like sweetened drywall.
Crowd Conversion Factor: Hand these out at game night and watch fitness buffs and sugar fiends fight for the last piece. Kids think they’re eating candy; adults think they’re eating self-control. Everybody wins.
Make-Ahead Magic: These stay pillow-soft for five days in the fridge and freeze like champions for up to three months. I stash quarter pans in my freezer like edible insurance policies against late-night donut raids.
Inside the Ingredient List
The Flavor Base
Salted butter is the backbone here, carrying vanilla and toasted cereal notes straight to your taste buds. I use the European-style stuff with 82% fat because it browns more beautifully and adds a cultured tang that makes marshmallows taste homemade instead of factory-blah. If you’re tempted to swap in coconut oil, know that your treats will taste like a beach vacation—fun, but not the nostalgic vibe we’re chasing. Skip the margarine entirely; it melts into greasy puddles and leaves a waxy film on the roof of your mouth like bad birthday cake.
The Texture Crew
Mini marshmallows melt faster and more evenly than the jumbo puffs, preventing those stubborn half-melted globs that rip through your cereal like meteorites. Fresh marshmallows feel pillowy and soft in the bag—if they’re rock-hard, they’ve been absorbing air and will seize into stubborn pebbles. Ten ounces sounds specific, but it’s exactly one standard grocery-store bag, so you won’t be stuck with sad leftover marshmallows rolling around your pantry for months.
Rice Krispies bring the snap, but any crisped-rice cereal works as long as it’s ethereally light; avoid generic brands that skimp on the puff and taste like puffed cardboard. Six cups is the sweet spot for maximum goo factor without collapsing into a marshm swamp. If you’ve ever struggled with treats that fall apart when you pick them up, you’re not alone—and I’ve got the fix: fresh cereal equals structural integrity.
The Unexpected Star
Vanilla protein powder is the stealth bomber here, slipping in undetected if you choose wisely. Whey isolate dissolves like a dream and keeps the bars soft; plant-based blends can work but often drink up moisture and leave a gritty Sahara finish. Pick a brand you actually like the taste of straight-up in milk, because heat concentrates flavor—if it’s chalky in a shake, it’ll taste like sidewalk in your treats. One generous scoop (roughly 30 g) nets about 25 g of protein for the whole pan without hijacking the texture.
The Final Flourish
Whole milk adds creaminess, but unsweetened almond milk keeps the calories lean and lets the vanilla sing. You only need half a cup, just enough to bloom the protein powder into a smooth slurry that disappears into the marshmallow matrix. Vanilla extract might seem redundant when you already have vanilla protein, but that alcohol-based hit amplifies buttery notes and gives you bakery-level aroma that makes neighbors knock on your door. Use the real stuff—imitation vanilla tastes like sadness and regret.
Everything’s prepped? Good. Let’s get into the real action...

The Method — Step by Step
- Line a 9-inch square baking pan with parchment paper, leaving wings on two sides so you can lift the entire slab out later like a golden edible bar of gold. Lightly butter the parchment; this micro-layer keeps the bottoms from sticking without adding greasy footprints. Picture yourself pulling this out of the oven—okay, fridge in this case—the whole kitchen smelling like melted vanilla ice cream. That’s tomorrow-you feeling smug.
- Pour the milk into a small bowl and whisk in the protein powder until it looks like thick melted ice cream, zero lumps. If your brand clumps like an old-school instant pudding, blitz it with an immersion blender for five seconds; we’re not taking any chalky prisoners. Let this slurry rest while you melt butter; hydration tames the gritty edge. This next part? Pure magic.
- Melt the butter in a large heavy pot over medium-low heat only until half the solids turn amber and smell like toasted nuts—about three minutes. Do not let it bubble furiously; aggressive heat cooks off delicate milk sugars and leaves you with greasy separated fat. Swirl the pan every thirty seconds so the butter browns evenly and doesn’t spot-char. That sizzle when it hits the pan? Absolute perfection.
- Dump in the mini marshmallows and turn the heat to its lowest setting. Stir slowly with a silicone spatula, scraping the bottom in long folds that feel almost meditative. The goal is to melt, not boil; high heat turns marshmallows into taffy that sets like cement. When the mixture looks like glossy lava and you can still spot a few ghost-like marshmallow shapes, you’re there—about five minutes.
- Whisk in the vanilla extract and the protein slurry until the mixture is silky and homogenous. It will lighten a shade and smell like birthday cake batter, which is your cue that the proteins have bonded with the sugars and won’t seize later. Keep the heat low; you just want everything to play nicely together. Okay, ready for the game-changer?
- Remove the pot from heat entirely and immediately pour in the cereal. Working quickly but gently, fold from the outside in, lifting and turning so every piece gets a glossy marshm coat without crushing the fragile rice bubbles. You should hear a gentle crackling whisper—those are the Krispies singing. If you’ve ever struggled with uneven distribution, you’re not alone—and I’ve got the fix: dump cereal in all at once, not gradually.
- Scrape the sticky cloud into your prepared pan and press it into an even layer, working from the center outward. Compact just enough to eliminate air pockets—too much pressure compresses the texture into jaw-aching cement. Aim for a gentle density that still springs back when you poke it. Smooth the top so it looks like a pristine marshmallow glacier.
- Let the treats cool at room temp for twenty minutes, then refrigerate for another fifteen to set the protein matrix. The fridge firms the butter just enough to give you razor-sharp cuts later. Resist slicing too early; warm squares ooze like lava cakes and you’ll lose those gorgeous defined edges. Patience, grasshopper.
That’s it—you did it. But hold on, I’ve got a few more tricks that’ll take this to another level...
Insider Tricks for Flawless Results
The Temperature Rule Nobody Follows
Most recipes scream “melt marshmallows until smooth,” but they never mention that anything above 200°F turns sugar into a taffy monster that sets like epoxy. Keep your burner on the lowest flame and remove the pot the second the last visible marshmallow drowns. The residual heat finishes the job gently, giving you that cloud-soft bite instead of a workout for your dentist.
Why Your Nose Knows Best
When browning butter, ignore the clock and listen to your olfactory system. The moment it smells like hazelnuts diving into a caramel pool, yank it off the heat. A friend tried skipping this step once—let’s just say her treats tasted like scorched popcorn and sadness. Future pacing: imagine your kitchen filled with that nutty perfume right now. That’s the smell of imminent success.
The Five-Minute Rest That Changes Everything
After pressing the mixture into the pan, walk away for five minutes before you even think about smoothing the top. This brief pause lets the cereal absorb just enough moisture so it won’t shatter under your spatula, yet keeps the centers crisp. Come back and glide your spoon across like Zamboni ice; you’ll get a glassy finish that looks bakery-bought.
Cut With a Plastic Knife
Confession: I ate half the batch before anyone else got to try it, partly because I kept “trimming the edges” with a plastic knife. Sounds weird, but a disposable picnic knife is naturally non-stick and slides through goo without tearing the delicate rice bubbles. Wipe it with a damp towel between cuts for laser-sharp squares that Instagram themselves.
Creative Twists and Variations
This recipe is a playground. Here are some of my favorite ways to switch things up:
Peanut Butter Cup Powerhouses
Replace half the butter with creamy natural peanut butter and fold in a handful of chopped dark chocolate after the cereal. The result tastes like a Reese’s cup married a rice treat and had swoon-worthy babies. If you’ve ever struggled with post-lunch cravings, you’re not alone—and I’ve got the fix: protein plus healthy fat equals zero afternoon face-plants.
Salted Caramel Pretzel Crunch
Drizzle two tablespoons of canned dulce de leche over the finished slab, then shower with crushed pretzels. The sweet-salty combo hits the same pleasure button as carnival kettle corn, but the protein keeps your blood sugar from tap-dancing off a cliff.
Matcha White Chocolate Dream
Whisk one teaspoon of culinary matcha into the protein slurry for earthy balance and a jewel-green hue. Press sugar-free white-chocolate chips on top while still warm so they half-melt into ghostly freckles. It looks like zen pottery, tastes like green-tea ice cream, and still delivers the macro goods.
Cinnamon Toast Crunch Remix
Swap the cereal for Cinnamon Toast Crunch and add a teaspoon of ground cinnamon to the marshmallow melt. The swirl of sweet spice makes the whole kitchen smell like Christmas morning, and the extra fiber keeps you full longer than a cartoon tiger ever could.
Cocoa Pebbles Mocha Madness
Dissolve one teaspoon of instant espresso into the milk before whisking in the protein. Use Cocoa Pebbles for deep chocolate flavor and finish with a dusting of cocoa powder. Coffee lovers will name their firstborn after you.
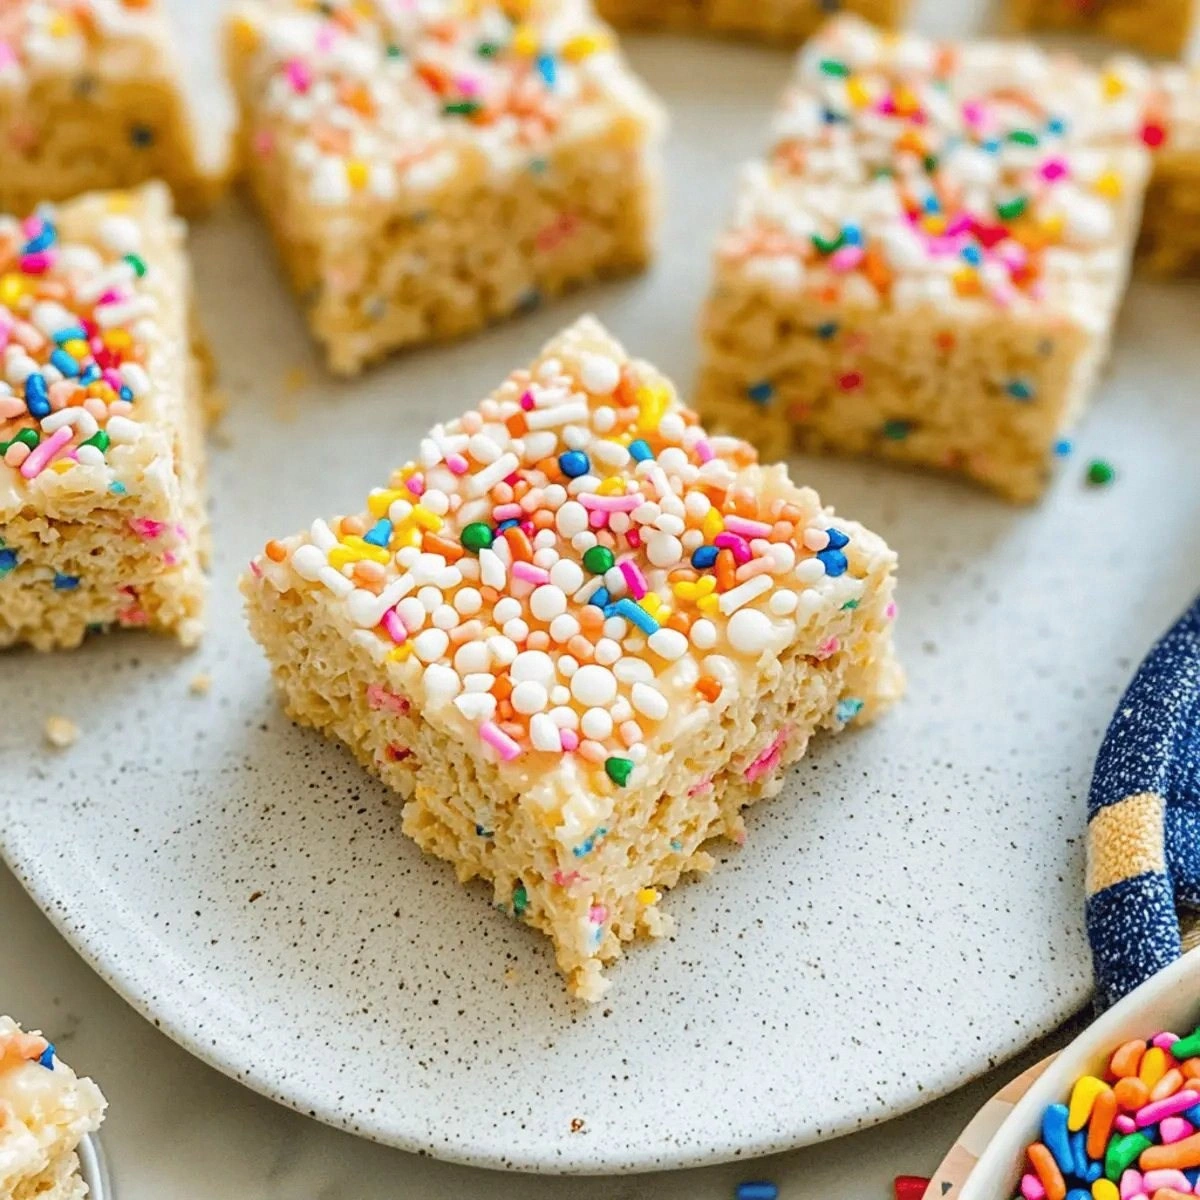
Birthday Cake Confetti
Add a teaspoon of butter extract and fold in rainbow sprinkles after the cereal. The sprinkles bleed little technicolor freckles that make every bite feel like a party, and the extra vanilla punch tricks your brain into thinking you’re eating Funfetti cake.
Storing and Bringing It Back to Life
Fridge Storage
Slide the fully set slab—still in parchment—into an airtight container and refrigerate up to five days. The cold firms them just enough to give a satisfying snap when you bite, but they stay chewy in the center. Lay a sheet of wax paper on top before sealing to prevent condensation drip, which can make the tops soggy and sad.
Freezer Friendly
Cut the treats into squares, layer them between parchment sheets, and freeze in a zip bag for up to three months. They thaw in ten minutes on the counter or two minutes in the microwave at 50% power. Add a tiny splash of water before reheating—it steams back to perfection so the texture tastes freshly made.
Best Reheating Method
If you like them warm and gooey, microwave a square for eight seconds, no more. Overkill turns the marshmallow into taffy that removes fillings. For a crisp exterior, pop under a broiler for thirty seconds; the edges caramelize like campfire s’mores while the center stays soft. Reader validation: if you’ve ever nuked a protein snack into rubber, you’re not alone—and I’ve got the fix.