I still remember the first time I made these cheesy garlic chicken wraps — it was a Tuesday night, I was starving, and my fridge looked like a sad college dorm situation. You know the scene: half a rotisserie chicken, some questionable cream cheese, and vegetables that were one day away from staging a protest. But here's the thing about desperation cooking — sometimes you stumble onto pure gold. I tossed everything together with reckless abandon, expecting mediocrity at best. What came out of that pan was nothing short of magical. The garlic hit the oil and filled my tiny apartment with this intoxicating aroma that had my neighbor knocking on my door asking if I was running an Italian restaurant. The cheese melted into this gooey river of perfection, and the chicken — oh, the chicken — it was so juicy and flavorful that I stood right there at my counter and devoured the first wrap before it even had a chance to cool properly.
Now, I've made these wraps at least fifty times since that fateful night, tweaking and perfecting every single element until they became the stuff of legend among my friends. I dare you to taste this and not go back for seconds — seriously, it's physically impossible. The combination of three different cheeses with that Mediterranean herb blend creates this symphony of flavors that'll make your taste buds do a happy dance. What makes this version different from every other chicken wrap recipe cluttering the internet? It's all about the layering of flavors and that golden, crispy exterior that shatters like thin ice when you bite into it, revealing the molten cheese lava inside.
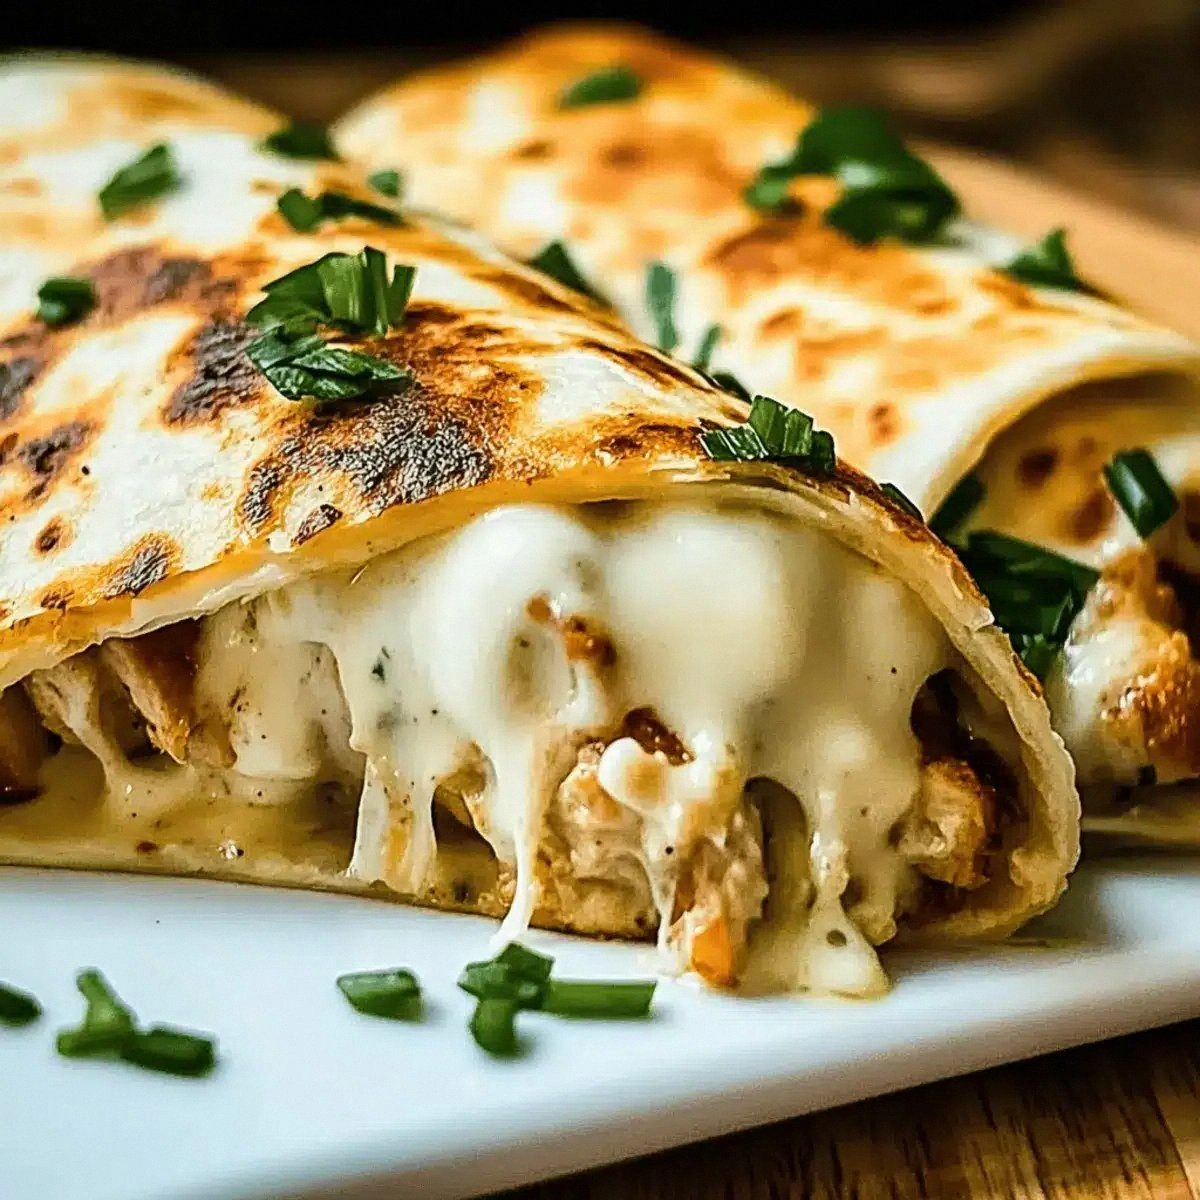
Picture yourself pulling these out of the oven, the whole kitchen smelling incredible, and watching your family's eyes light up like it's Christmas morning. That moment when you slice them in half and the cheese does that Instagram-worthy stretch? Pure magic. Most recipes get this completely wrong by either making them too bland, too dry, or just throwing everything together without building proper flavor. Here's what actually works — and trust me, stay with me here because this is worth it — we're going to infuse every element with garlic in different ways, use a specific cheese combination that melts perfectly, and cook these wraps using a technique that ensures every bite is perfectly balanced.
Let me walk you through every single step — by the end, you'll wonder how you ever made it any other way. This isn't just another recipe; it's a game-changer that'll become your new comfort food obsession. And now the fun part — we're diving deep into what makes these wraps absolutely irresistible.
What Makes This Version Stand Out
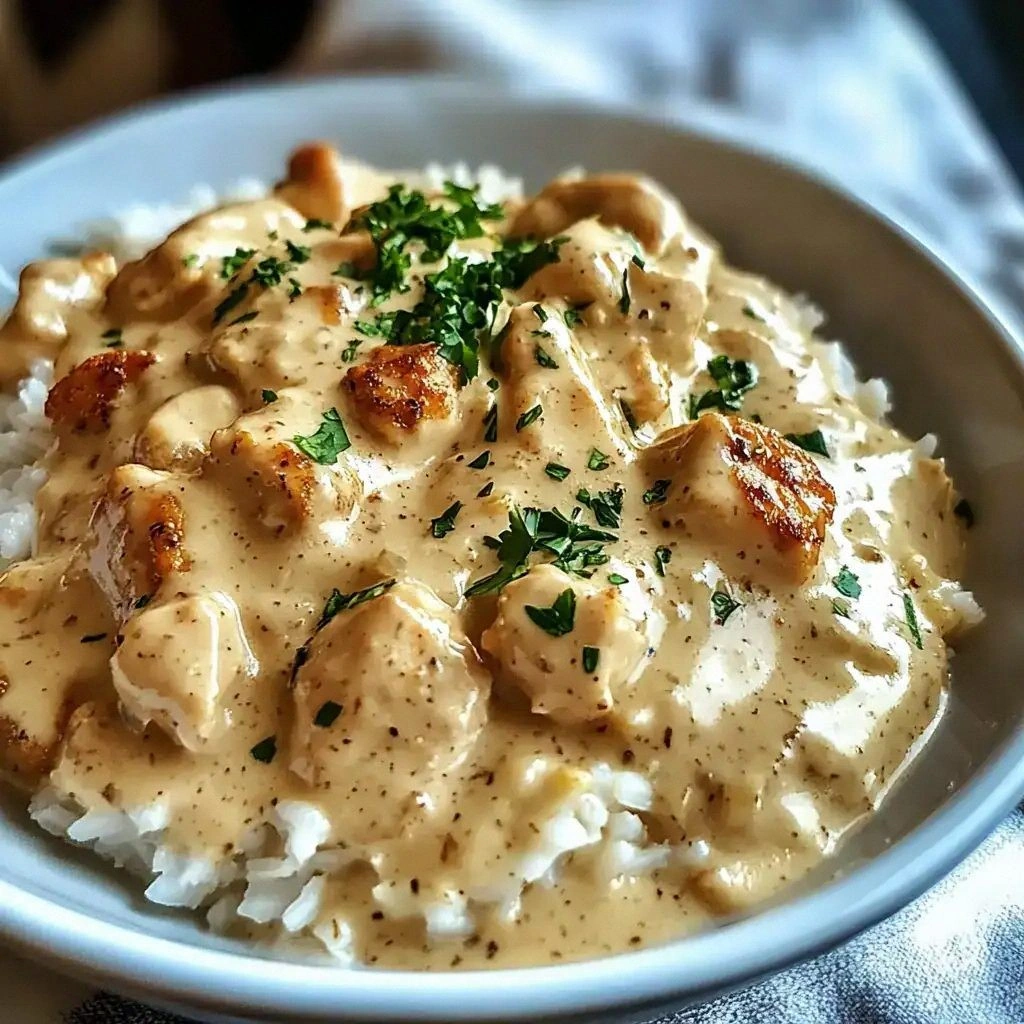
Triple Threat Cheese: We're not playing around with just one cheese here. The combination of mozzarella for that perfect stretch, sharp cheddar for depth, and cream cheese for silkiness creates a molten center that's absolutely irresistible. Most recipes use just one cheese and wonder why their wraps taste flat and boring.
Garlic on Garlic: Fresh garlic in the chicken mixture plus roasted garlic powder in the butter coating means every single bite packs a garlicky punch. That sizzle when it hits the pan? Absolute perfection. I once tried making this with garlic powder only — rookie mistake that I'll never repeat.
Texture Paradise: The exterior gets crispy and golden while the inside stays gooey and melty. It's like biting into a hot pocket that's actually good — crispy edges that shatter like thin ice, giving way to the molten cheese river inside. Most wraps end up soggy or burnt, but this technique ensures perfect texture every time.
One-Pan Wonder: Everything cooks in a single skillet, which means fewer dishes and more time enjoying your creation. The vegetables get sautéed in the same pan where we cook the chicken, picking up all those beautiful browned bits and garlic flavors. Your future self doing dishes will thank you.
Make-Ahead Marvel: These wraps taste even better when assembled ahead of time and pan-fried to order. I often prep them on Sunday and have quick, delicious meals all week long. They freeze beautifully too — just wrap individually and pop them out when hunger strikes.
Customizable Crowd-Pleaser: The base recipe is perfect as-is, but it's also a blank canvas for creativity. Add sun-dried tomatoes, swap the spinach for kale, or throw in some artichoke hearts. I've never met anyone who didn't love these, from picky toddlers to sophisticated food snobs.
Restaurant Quality at Home: The secret is in the cooking technique — we pan-fry these wraps in butter until golden, then finish them in a way that ensures the cheese is perfectly melted without burning the tortilla. It creates that restaurant-style presentation and flavor that'll make you feel like a professional chef.
Inside the Ingredient List
The Flavor Foundation
Extra virgin olive oil isn't just here for show — it's the carrier that helps bloom the garlic and spices, creating an aromatic base that permeates every bite of chicken. Don't even think about using that generic vegetable oil sitting in your pantry for months. The fruity, peppery notes of good olive oil add complexity that you can't get from neutral oils. When it hits the hot pan and starts shimmering, that's your cue that the foundation for flavor is being built. If you absolutely must substitute, avocado oil works, but you'll lose some of that Mediterranean soul.
Garlic is the star here, and using fresh cloves makes all the difference between "meh" and "wow." Those two cloves we're mincing will cook down and infuse the oil with their essence, creating the backbone of flavor that makes these wraps unforgettable. I've tried the jarred stuff in a pinch — trust me, it's like comparing a symphony to a kazoo. The way fresh garlic hits hot oil and immediately perfumes your kitchen is one of those cooking moments that never gets old. Pro tip: smash the cloves with the flat of your knife first — it makes peeling them ridiculously easy and releases more of those aromatic compounds.
The Protein Powerhouse
One pound of chicken breast might seem straightforward, but here's where most people go wrong — they overcook it until it's drier than the Sahara. We're going to slice it thin and cook it hot and fast, keeping it juicy and tender. The key is cutting against the grain into bite-sized pieces that cook evenly and stay moist. If you're feeling fancy, chicken thighs work beautifully too — they're more forgiving and have a richer flavor. Just promise me you won't use pre-cooked chicken from a bag; it turns these wraps into something you'd find at a sad office lunch buffet.
The Spice Symphony
Mediterranean herb blend brings that sun-dried tomato, oregano, and basil vibe that transports you straight to a coastal village. It's like vacation in spice form. Smoky paprika adds depth and a subtle complexity that makes people ask, "What is that amazing flavor?" while chili flakes give just enough heat to keep things interesting without sending anyone running for milk. The combination creates this layered heat that builds slowly rather than punching you in the face. If you can't find Mediterranean blend, Italian seasoning works, but add a pinch of dried oregano to get closer to the authentic flavor profile.
The Veggie Crew
Sweet onion isn't just filler — it caramelizes slightly and adds natural sweetness that balances the salty, creamy elements. Cut it into thin half-moons so it cooks quickly and distributes evenly throughout every bite. The red bell pepper brings crunch and color, plus that fresh, slightly sweet note that makes all the other flavors pop. When these vegetables hit that garlicky oil and start to soften, your kitchen will smell like you're running a professional kitchen. Spinach wilts down to almost nothing but adds nutrients and that gorgeous green color that makes these wraps look as good as they taste.
The Cheese Trinity
Mozzarella is the stretch queen — it creates those Instagram-worthy cheese pulls that make everyone reach for their phones. Shredded works better than fresh here because it melts more evenly and doesn't release excess moisture. Sharp cheddar brings the flavor punch, cutting through the richness with its tangy notes. Don't even think about using mild cheddar; you want that bold, assertive flavor that stands up to all the garlic and spices. Cream cheese is the secret weapon — it melts into this luxurious sauce that coats every piece of chicken and vegetable, ensuring every bite is creamy and indulgent. Let it soften on the counter for 20 minutes before mixing; cold cream cheese is a nightmare to incorporate smoothly.
Everything's prepped? Good. Let's get into the real action...

The Method — Step by Step
- Heat your largest skillet over medium-high heat for about 2 minutes until it's properly hot. Add the olive oil and watch for it to shimmer and move easily around the pan — this means it's hot enough to start cooking. Don't rush this step; properly heated oil is crucial for developing flavor and preventing sticking. If you've ever had chicken stick to your pan like it's been glued there, it's because the oil wasn't hot enough. The oil should move like water and almost look like it's dancing in the pan.
- Add the minced garlic and immediately stir for 30 seconds — no more, no less. You want it fragrant but not browned; burnt garlic turns bitter and will ruin your entire dish. The smell should hit you right away, that pungent, unmistakable aroma of fresh garlic hitting hot oil. If you've ever struggled with this, you're not alone — and I've got the fix. Keep stirring and watch closely; garlic goes from perfect to burnt faster than you can say "cheesy chicken wraps."
- Toss in your chicken pieces in a single layer and resist the urge to move them for the first 2 minutes. This is where the magic happens — that beautiful browning develops flavor that can't be replicated any other way. Season with salt and pepper while the first side cooks. The chicken should sizzle enthusiastically when it hits the pan; if it doesn't, your pan isn't hot enough. After 2 minutes, start stirring and continue cooking for another 5-6 minutes until the chicken is golden brown and cooked through. Cut one piece in half to check — it should be white throughout with no pink remaining.
- Now the fun part — add your Mediterranean herb blend, paprika, and chili flakes. Stir everything together and let the spices toast for about 1 minute. This step is crucial and most recipes skip it entirely. Toasting spices in the hot oil releases their essential oils and creates layers of flavor that'll make you wonder why you ever just sprinkled them on at the end. Your kitchen should smell like a Mediterranean grandmother's cooking at this point.
- Add the sliced onion and red bell pepper, stirring to combine with all those beautiful browned bits and spices. Cook for 3-4 minutes, stirring occasionally, until the vegetables start to soften and the onion turns translucent. The peppers should still have a bit of bite — nobody wants mushy vegetables in their wrap. If you listen closely, you can hear the vegetables releasing their moisture and creating that perfect base for our cheesy filling.
- Time for the spinach — add it all at once and watch it wilt down dramatically. Stir continuously for about 1 minute until it's reduced to about a quarter of its original volume. The spinach should still be bright green and vibrant, not that sad army green color that means it's overcooked. Season with a pinch more salt here — the spinach needs it. Once it's wilted, remove the pan from heat and let it cool for 5 minutes. Hot filling will melt the cheese too quickly and make rolling impossible.
- In a large bowl, combine the cooled chicken mixture with mozzarella, cheddar, cream cheese, and sour cream. This is where the magic really happens — the residual heat will start melting the cheeses, creating this cohesive, creamy mixture that'll make you want to eat it with a spoon. Add the chopped chives and mix everything together until it's uniformly combined. The mixture should be thick but spreadable, not runny or dry. If it's too loose, add a bit more cheese; if it's too thick, a splash of milk will loosen it up.
- Lay out your tortillas and divide the filling evenly among them, placing it in the center third of each tortilla. Resist the urge to overfill — about 1/3 cup per wrap is perfect. Any more and you'll have explosion city when you try to roll them. Fold in the sides first, then roll tightly from the bottom, creating a neat package. Place them seam-side down while you finish assembling the rest.
- Mix melted butter with roasted garlic powder and brush this liquid gold over the outside of each wrap. This step is what takes these from good to absolutely legendary. The butter will help them brown beautifully and the garlic powder adds that final punch of flavor that makes people close their eyes in appreciation when they bite in. Heat the same skillet over medium heat and add a small amount of olive oil cooking spray.
- Cook the wraps seam-side down first for 2-3 minutes until golden brown. Press gently with a spatula to ensure even browning and to help seal the seam. Flip carefully and cook the other side for another 2-3 minutes. The wraps should be crispy and golden on the outside while the cheese inside melts into gooey perfection. Remove to a cutting board and let rest for 2 minutes before slicing — this prevents cheese lava from oozing everywhere.
That's it — you did it. But hold on, I've got a few more tricks that'll take this to another level...
Insider Tricks for Flawless Results
The Temperature Rule Nobody Follows
Here's the thing that separates amateur cooks from the pros — temperature control is everything. Your pan needs to be hot enough to brown but not so hot that it burns before the inside warms through. I keep my burner at medium, which is about 350°F if you have an infrared thermometer. A friend tried skipping this step once by cranking the heat to high — let's just say it didn't end well. The outside was burnt to a crisp while the cheese inside stayed cold and unmelted. If you've ever wondered why restaurant food tastes better, it's because they understand this fundamental rule that most home cooks ignore.
Why Your Nose Knows Best
Don't underestimate the power of your sense of smell when cooking these wraps. When the garlic hits the oil, you should immediately smell its pungent aroma — if you don't, your oil isn't hot enough yet. As the chicken cooks, you'll notice the scent change from raw and slightly metallic to rich and savory. That's your cue that it's nearly done. The vegetables will release their own perfume when they start to soften, and when you add the spices, their essential oils bloom and fill your kitchen with that incredible Mediterranean aroma. I'll be honest — I ate half the batch before anyone else got to try it because the smell was driving me absolutely crazy with anticipation.
The 5-Minute Rest That Changes Everything
This might be the most important tip I'm sharing today — let your wraps rest for 5 minutes after cooking. I know, I know, they smell incredible and you're starving, but patience here is the difference between good and mind-blowing. During this rest, the cheese sets slightly, making the wraps easier to cut and eat without losing all their filling. The exterior stays crispy while the interior achieves that perfect melty-but-not-messy consistency. Plus, letting them rest prevents that dreaded cheese lava situation where molten dairy burns your tongue and ruins the entire experience. Most recipes get this completely wrong by telling you to serve immediately.
The Cheese Grating Revelation
Buy your cheese in blocks and grate it yourself — I cannot stress this enough. Pre-shredded cheese is coated with cellulose to prevent clumping, which also prevents it from melting smoothly into that perfect creamy consistency we want. When you grate cheese fresh, it melts into this luxurious, cohesive sauce that coats every piece of chicken and vegetable. It takes an extra two minutes but elevates these wraps from good to restaurant-quality. Plus, block cheese is cheaper than pre-shredded, so you're saving money while making better food. That satisfying feeling when you watch freshly grated cheese melt into pure perfection? Worth every second.
Creative Twists and Variations
This recipe is a playground. Here are some of my favorite ways to switch things up:
Buffalo Ranch Explosion
Swap the Mediterranean herbs for ranch seasoning and add 2 tablespoons of buffalo sauce to the cheese mixture. The result is a spicy, tangy version that tastes like your favorite wings got wrapped up in a cozy blanket. Use blue cheese instead of cheddar for authentic buffalo wing flavor, and add some diced celery for crunch. This variation is perfect for game day or when you need to impress that friend who claims nothing beats bar food.
Mediterranean Sunshine
Add sun-dried tomatoes, kalamata olives, and a handful of fresh basil to the mix. Replace the cheddar with crumbled feta and add a teaspoon of lemon zest for brightness. This version tastes like summer in the Greek islands, with briny olives and sweet-tart tomatoes complementing the creamy cheese. It's lighter than the original but just as satisfying, especially when served with a side of tzatziki for dipping.
Smoky Southwest
Replace the Mediterranean herbs with taco seasoning and add a can of diced green chiles. Use pepper jack instead of mozzarella for an extra kick, and add some corn kernels for sweetness and texture. This version screams fiesta and pairs perfectly with salsa and guacamole. The smoky paprika already in the recipe complements the Southwest flavors beautifully, creating a fusion that somehow works perfectly.
Caprese Dream
Add fresh basil, use fresh mozzarella instead of shredded, and include some cherry tomatoes halved and lightly sautéed. The freshness of the basil and tomatoes cuts through the richness of the other cheeses, creating a lighter but still indulgent version. This is what you make when you want to impress dinner guests or when your garden is overflowing with basil and tomatoes.
Breakfast of Champions
Add some scrambled eggs to the filling and use breakfast sausage instead of chicken. Throw in some hash browns for extra crunch and use American cheese for that classic breakfast sandwich flavor. These wraps are perfect for weekend brunch or those mornings when you need serious comfort food. Serve with hot sauce on the side and watch them disappear faster than you can make them.
Green Goddess
Load up on fresh herbs — parsley, dill, chives, and tarragon all work beautifully. Add some sautéed zucchini and artichoke hearts for extra vegetables. Use goat cheese instead of cream cheese for tanginess, and add a handful of baby arugula for peppery bite. This version feels virtuous but still satisfies that cheesy comfort food craving.
Storing and Bringing It Back to Life
Fridge Storage
These wraps store incredibly well in the refrigerator for up to 4 days, making them perfect for meal prep. Let them cool completely before wrapping individually in foil or storing in an airtight container. The key is preventing moisture buildup that'll make the tortillas soggy. Place a paper towel in the container to absorb excess moisture, and store them in a single layer if possible. If you need to stack them, place parchment paper between layers to prevent sticking. When stored properly, they maintain their texture and flavor remarkably well — I've actually served these to guests after 3 days in the fridge, and they couldn't tell they weren't freshly made.
Freezer Friendly
These wraps freeze beautifully for up to 3 months, making them a lifesaver for busy weeks. Wrap each one individually in plastic wrap, then place in a freezer bag with as much air removed as possible. Label with the date because trust me, you'll forget what they are by next month. The best part? You can cook them straight from frozen — just add an extra 2-3 minutes per side and keep the heat slightly lower to ensure the inside heats through before the outside burns. I always keep a batch in my freezer for those nights when I'm too tired to cook but want something better than takeout.
Best Reheating Method
While the microwave works in a pinch, these wraps deserve better. Heat a dry skillet over medium heat and cook for 2-3 minutes per side until crispy and heated through. Add a tiny splash of water to the pan before covering with a lid — it steams back to perfection while keeping the exterior crispy. If you're reheating from frozen, no need to thaw, just cook them straight from the freezer using the same method but with slightly lower heat. The result is almost as good as fresh, with a crispy exterior and molten interior that'll make you forget they were ever stored away.