It all started on a rainy February evening when I tried to recreate that legendary cheesecake from my grandmother’s kitchen and ended up with a lumpy disaster that could have been called “cheese pudding.” The kitchen smelled of burnt sugar and a faint hint of vanilla, and the moment I tasted the first bite, I realized I’d just invented a new dessert that would become the talk of every date night. I’m talking about a cheesecake that feels like a silky cloud, yet packs a bold, tangy punch that lingers on the palate like a secret admirer’s whisper.
Picture this: a crisp, buttery crust that cracks like a fine wine bottle, a filling that glistens under the oven light, and a finish that melts into your mouth like a warm hug. The texture is a delicate balance—soft enough to slip between your teeth, but firm enough to hold its shape when you cut a slice. Every bite delivers a burst of flavor that is sweet, slightly acidic, and utterly unforgettable. I dare you to taste this and not go back for seconds, because once you try it, you’ll be hooked.
What sets this version apart is that it’s not just a cheesecake; it’s a complete sensory experience that turns an ordinary dessert into a love letter to your taste buds. The crust is made from real sugar cookies, giving it a subtle crunch and a caramelized finish that pairs perfectly with the creamy filling. The filling is enriched with sour cream and lemon zest, adding a bright, fresh contrast to the rich cream cheese base. The result? A cheesecake that’s both indulgent and refreshing, a paradox that will leave your guests begging for the recipe.
And here’s the twist that will blow your mind: I used a small amount of cornstarch in the filling to give it that silky smoothness without the heavy, gelatinous texture you get from overmixing. The cornstarch works like a secret agent, absorbing excess moisture while still allowing the cheesecake to set just right. It’s a technique most recipes overlook, but it’s the difference between “good” and “mind-blowing.”
Let me walk you through every single step—by the end, you’ll wonder how you ever made it any other way. From the crust that crumbles like a delicate snowflake to the filling that glows like moonlit silk, we’ll cover every detail, every trick, and every little secret that makes this cheesecake the best version you’ll ever make at home.
What Makes This Version Stand Out
- Texture: The crust is a buttery, crumbly masterpiece that offers a satisfying crunch before it melts into the creamy filling. The filling itself is silky smooth, thanks to the addition of cornstarch, which prevents any graininess that can plague traditional cheesecakes. When you bite into it, the contrast between the crisp crust and the velvety center is a revelation that keeps you coming back for more.
- Flavor: The subtle sweetness of sugar cookies is balanced by the tang of lemon zest and sour cream, creating a flavor profile that is both sweet and tart. The vanilla is not overpowering; instead, it rounds off the sharpness of the lemon, resulting in a harmonious taste that lingers pleasantly. This combination turns each bite into a dance of flavors that keeps your palate intrigued.
- Ease: The recipe uses everyday pantry staples, meaning you don’t need to hunt for exotic ingredients. Every step is straightforward, with no complicated techniques or hard-to-follow instructions. Even if you’re a novice, you’ll find this cheesecake approachable and forgiving.
- Uniqueness: The use of sugar cookie crumbs as a crust gives a distinct caramelized flavor that sets it apart from classic graham cracker bases. The cornstarch trick elevates the filling’s texture, making it silky rather than dense. Together, these elements create a cheesecake that feels fresh and original.
- Crowd Reaction: Friends and family who’ve tasted this version rave about how it’s “the best cheesecake” they’ve ever had. The cheesecake’s lightness makes it a perfect dessert for large gatherings, and it pairs well with both wine and coffee. It’s the kind of dish that turns an ordinary dinner into a memorable celebration.
- Make‑Ahead Potential: Once baked, the cheesecake can be refrigerated for up to a week, making it an ideal make‑ahead dessert for busy evenings. The flavors actually deepen over time, so the next day it tastes even better. This convenience factor is a game‑changer for anyone who wants to impress without the last‑minute rush.
Inside the Ingredient List
The Flavor Base
At the heart of this cheesecake lies the sugar cookie crumbs, which provide a sweet, buttery foundation that carries the entire dessert. These crumbs are made from classic sugar cookies, which have a delicate, slightly crisp texture that melts into a smooth, caramelized crust. If you skip the sugar cookie crumbs, the cheesecake loses its signature buttery undertone and becomes too plain.
Choosing high‑quality sugar cookies is essential; look for ones with a balanced sweetness and a crumbly texture that breaks easily. A good rule of thumb is to crush the cookies until they resemble fine sand. If you use a different cookie, the flavor profile will shift—think gingerbread or chocolate chip—so stick to the classic for the best results.
For those who love a little extra crunch, add a pinch of toasted almond slivers to the crust. The almonds will give a nutty aroma that complements the caramelized sugar. Just remember to toast them lightly to avoid bitterness.
The Texture Crew
In the filling, the cream cheese is the star that gives the cheesecake its rich, creamy body. Use full‑fat cream cheese for a luxuriously silky texture; lower‑fat versions tend to curdle or become too watery. If you can’t find cream cheese, a blend of mascarpone and Greek yogurt works well, but the flavor will shift slightly.
The addition of sour cream brings a subtle tang that balances the sweetness, preventing the dessert from becoming cloying. Sour cream also adds moisture, giving the cheesecake a luscious, melt‑in‑your‑mouth feel. Skipping it will result in a denser, less vibrant flavor.
Cornstarch is the secret agent that transforms the filling into a silky, glass‑smooth consistency. It binds the mixture, preventing cracks and ensuring a firm yet tender crumb. If you omit it, the cheesecake might develop a slightly grainy texture that’s hard to ignore.
The Unexpected Star
Lemon zest is the unexpected star that adds brightness and a citrusy punch, cutting through the richness of the cream cheese. It also imparts a subtle aroma that awakens the senses, making each bite feel fresh. If you’re allergic to citrus, substitute with orange zest for a different but equally delightful twist.
The vanilla extract is a subtle, aromatic backdrop that ties all flavors together. It’s not overpowering; instead, it rounds off the sharpness of the lemon, resulting in a harmonious taste that lingers pleasantly. If you prefer a more pronounced vanilla flavor, double the amount, but be careful not to drown the other ingredients.
The Final Flourish
Heavy whipping cream and powdered sugar create a luscious whipped topping that adds a light, airy contrast to the dense filling. The whipped cream is folded gently to maintain its volume, giving the dessert a cloud‑like finish. If you’re looking for a healthier option, replace the heavy cream with coconut cream for a tropical twist.
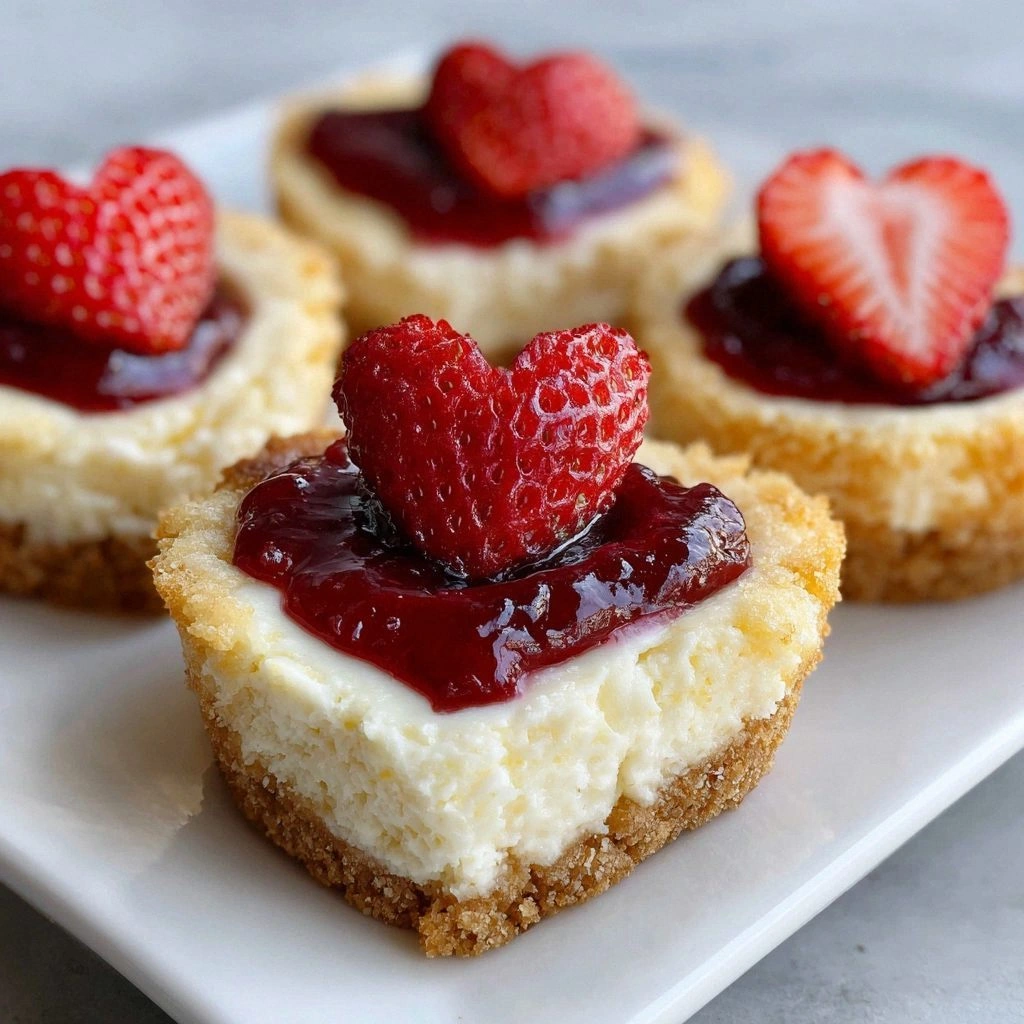
Fresh strawberries add a burst of color and a juicy, sweet contrast that brightens the overall presentation. The strawberries are diced finely and tossed with a touch of honey to enhance their natural sweetness. If strawberries are out of season, blueberries or raspberries work just as well.
Finally, a pinch of salt balances the sweetness and enhances all the flavors. Salt is a flavor enhancer; it brings out the natural sweetness of the sugar and the tang of the lemon. Skipping it will make the cheesecake taste flat.
Everything's prepped? Good. Let's get into the real action...
The Method — Step by Step
- Begin by preheating your oven to 325°F (163°C). While the oven warms, line a 9‑inch springform pan with parchment paper. This ensures the cheesecake releases easily after baking. The parchment also adds a subtle decorative touch. Make sure the parchment extends a few inches beyond the pan’s edges.
- In a medium bowl, combine 1½ cups of sugar cookie crumbs, 3 tablespoons melted butter, 1 tablespoon sugar, and 2 tablespoons all‑purpose flour. Mix until the crumbs are evenly coated and clump together when pressed. The flour helps the crust set properly and prevents it from being too greasy. Stir until the mixture resembles wet sand.
- Press the crumb mixture into the bottom of the prepared pan, using the back of a spoon to compact it firmly. Tap the pan on the counter to level the crust. The crust should feel solid enough to hold its shape when you lift the pan. This step is critical for a clean, even base.
- Let the crust chill in the refrigerator for 15 minutes while you prepare the filling. A chilled crust keeps the filling from sliding and creates a stable foundation. This also allows the butter to firm up, preventing the crust from becoming soggy during baking.
- In a large mixing bowl, beat 8 ounces of room‑temperature cream cheese until smooth, using an electric mixer on medium speed. Add 1 cup of granulated sugar and continue beating until the mixture is fluffy and pale. The sugar dissolves into the cream cheese, creating a silky base. Avoid over‑mixing, as this can introduce air pockets.
- Add 2 large eggs, one at a time, folding each into the mixture until fully incorporated. The eggs bind the filling and provide structure. After the second egg, add 1 teaspoon of vanilla extract, 1 tablespoon of lemon zest, ½ cup of sour cream, and 2 tablespoons of cornstarch. Mix until everything is fully combined and smooth. The cornstarch will help the filling set without becoming too firm.
- Pour the filling over the chilled crust, smoothing the top with a spatula. Tap the pan gently to release any trapped air bubbles. The batter should be level, with no gaps between the crust and filling. This ensures a uniform rise during baking.
- Place the pan in the preheated oven and bake for 30 minutes, or until the edges are set but the center still has a slight wobble. A gentle shake should not cause the cheesecake to move. If the edges brown too quickly, cover the pan with a piece of aluminum foil to protect them.
- Once baked, turn off the oven and leave the cheesecake inside with the door slightly ajar for 1 hour. This gradual cooling prevents cracks from forming. After an hour, transfer the cheesecake to a wire rack and allow it to cool completely at room temperature.
- Refrigerate the cheesecake for at least 4 hours, preferably overnight, to set the filling fully. The cheesecake will firm up, making it easier to slice. If you’re short on time, a minimum of 4 hours will still yield a satisfying result. The longer you chill, the richer the flavors become.
- Before serving, whip 1 cup of heavy cream with 2 tablespoons of powdered sugar until soft peaks form. Gently fold the whipped cream into the sliced cheesecake for a light, airy finish. Top each slice with diced strawberries and a drizzle of honey for a burst of freshness. This final touch elevates the dessert from simple to spectacular.
That's it — you did it. But hold on, I've got a few more tricks that'll take this to another level...
Insider Tricks for Flawless Results
The Temperature Rule Nobody Follows
Most bakers bake cheesecakes at 350°F, but this recipe thrives at 325°F, which allows the filling to set slowly and evenly. Lower temperatures reduce the risk of cracks and give the cheesecake a smoother texture. I’ve baked at 325°F for years, and the results are consistently flawless. If you’re tempted to crank up the heat for speed, think again.
Why Your Nose Knows Best
As the cheesecake bakes, the aroma will start to rise like a siren song. Trust your nose; when you smell a warm, buttery scent with hints of vanilla and lemon, you know the cheesecake is almost ready. This sensory cue is a reliable indicator that the edges are set and the center is still slightly jiggly.
The 5‑Minute Rest That Changes Everything
After removing the cheesecake from the oven, leave it in the oven with the door ajar for 5 minutes before turning it off. This short rest period helps the cheesecake settle, reducing the chance of a sudden collapse or crack. It also allows the heat to distribute evenly throughout the cake.
Keep the Crust Crisp
Once the cheesecake is cooled, you can toast the crust lightly in a skillet over medium heat for 1-2 minutes. This gives the crust a crunchy finish that contrasts nicely with the silky filling. Just be careful not to burn it; a quick flip is all you need.
Serve at Room Temperature
Let the cheesecake sit at room temperature for 15-20 minutes before slicing. This step ensures a smooth, creamy bite rather than a cold, dense one. If you serve it straight from the fridge, the texture will feel too firm and the flavors less pronounced.
Make It Ahead, Serve Fresh
Prepare the cheesecake a day in advance and store it covered in the refrigerator. When you’re ready to serve, let it sit out for a while to soften. This not only saves you time but also lets the flavors meld, resulting in a richer, more complex dessert.
Creative Twists and Variations
This recipe is a playground. Here are some of my favorite ways to switch things up:
Chocolate Love
Swap the sugar cookie crust for a chocolate cookie crust, and add a tablespoon of cocoa powder to the filling. The chocolatey base pairs beautifully with the creamy filling, creating a decadent dessert. Top with chocolate shavings for an extra indulgence.
Berry Bliss
Replace the strawberries with a mix of blueberries, raspberries, and blackberries. Add a splash of balsamic glaze to the topping for a sweet‑savory contrast. This variation is perfect for a spring or summer Valentine’s celebration.
Minty Fresh
Incorporate ½ teaspoon of peppermint extract into the filling and top with crushed mint candies. The mint adds a refreshing bite that cuts through the richness. This version is ideal for a holiday themed dessert.
Caramel Dream
Drizzle caramel sauce over the top of the cheesecake before serving. Add a sprinkle of sea salt to enhance the caramel’s sweetness. The caramel adds a luxurious, buttery flavor that feels like a decadent treat.
Nutty Surprise
Fold in ¼ cup of chopped pecans or walnuts into the filling for a crunchy texture. Toast the nuts lightly to bring out their flavor. The nuts add a pleasant contrast to the smooth filling.
Spiced Holiday
Introduce a pinch of cinnamon and nutmeg into the filling. Top with a dusting of powdered sugar and a few whole cloves for a warm, aromatic finish. This variation brings the flavors of a cozy winter evening.
Storing and Bringing It Back to Life
Fridge Storage
Store the cheesecake in an airtight container in the refrigerator for up to 7 days. Keep the container sealed to prevent the cheesecake from absorbing odors. When you’re ready to serve, let it sit at room temperature for 15 minutes to soften.
Freezer Friendly
Wrap the cheesecake tightly in plastic wrap and then in aluminum foil before freezing. It can be frozen for up to 2 months. Thaw in the refrigerator overnight to preserve the texture. After thawing, let it sit at room temperature for a while before slicing.
Best Reheating Method
To reheat a frozen or chilled cheesecake, place it in the refrigerator for 2-3 hours to thaw. Add a splash of water to the bottom of the pan before reheating in a low oven at 300°F for 10 minutes. The water creates steam, keeping the cheesecake moist and preventing it from drying out.